NFC Tags
Tap an NFC tag on a contactless reader or on a Switch controller to fire a macro or press a mapped button.
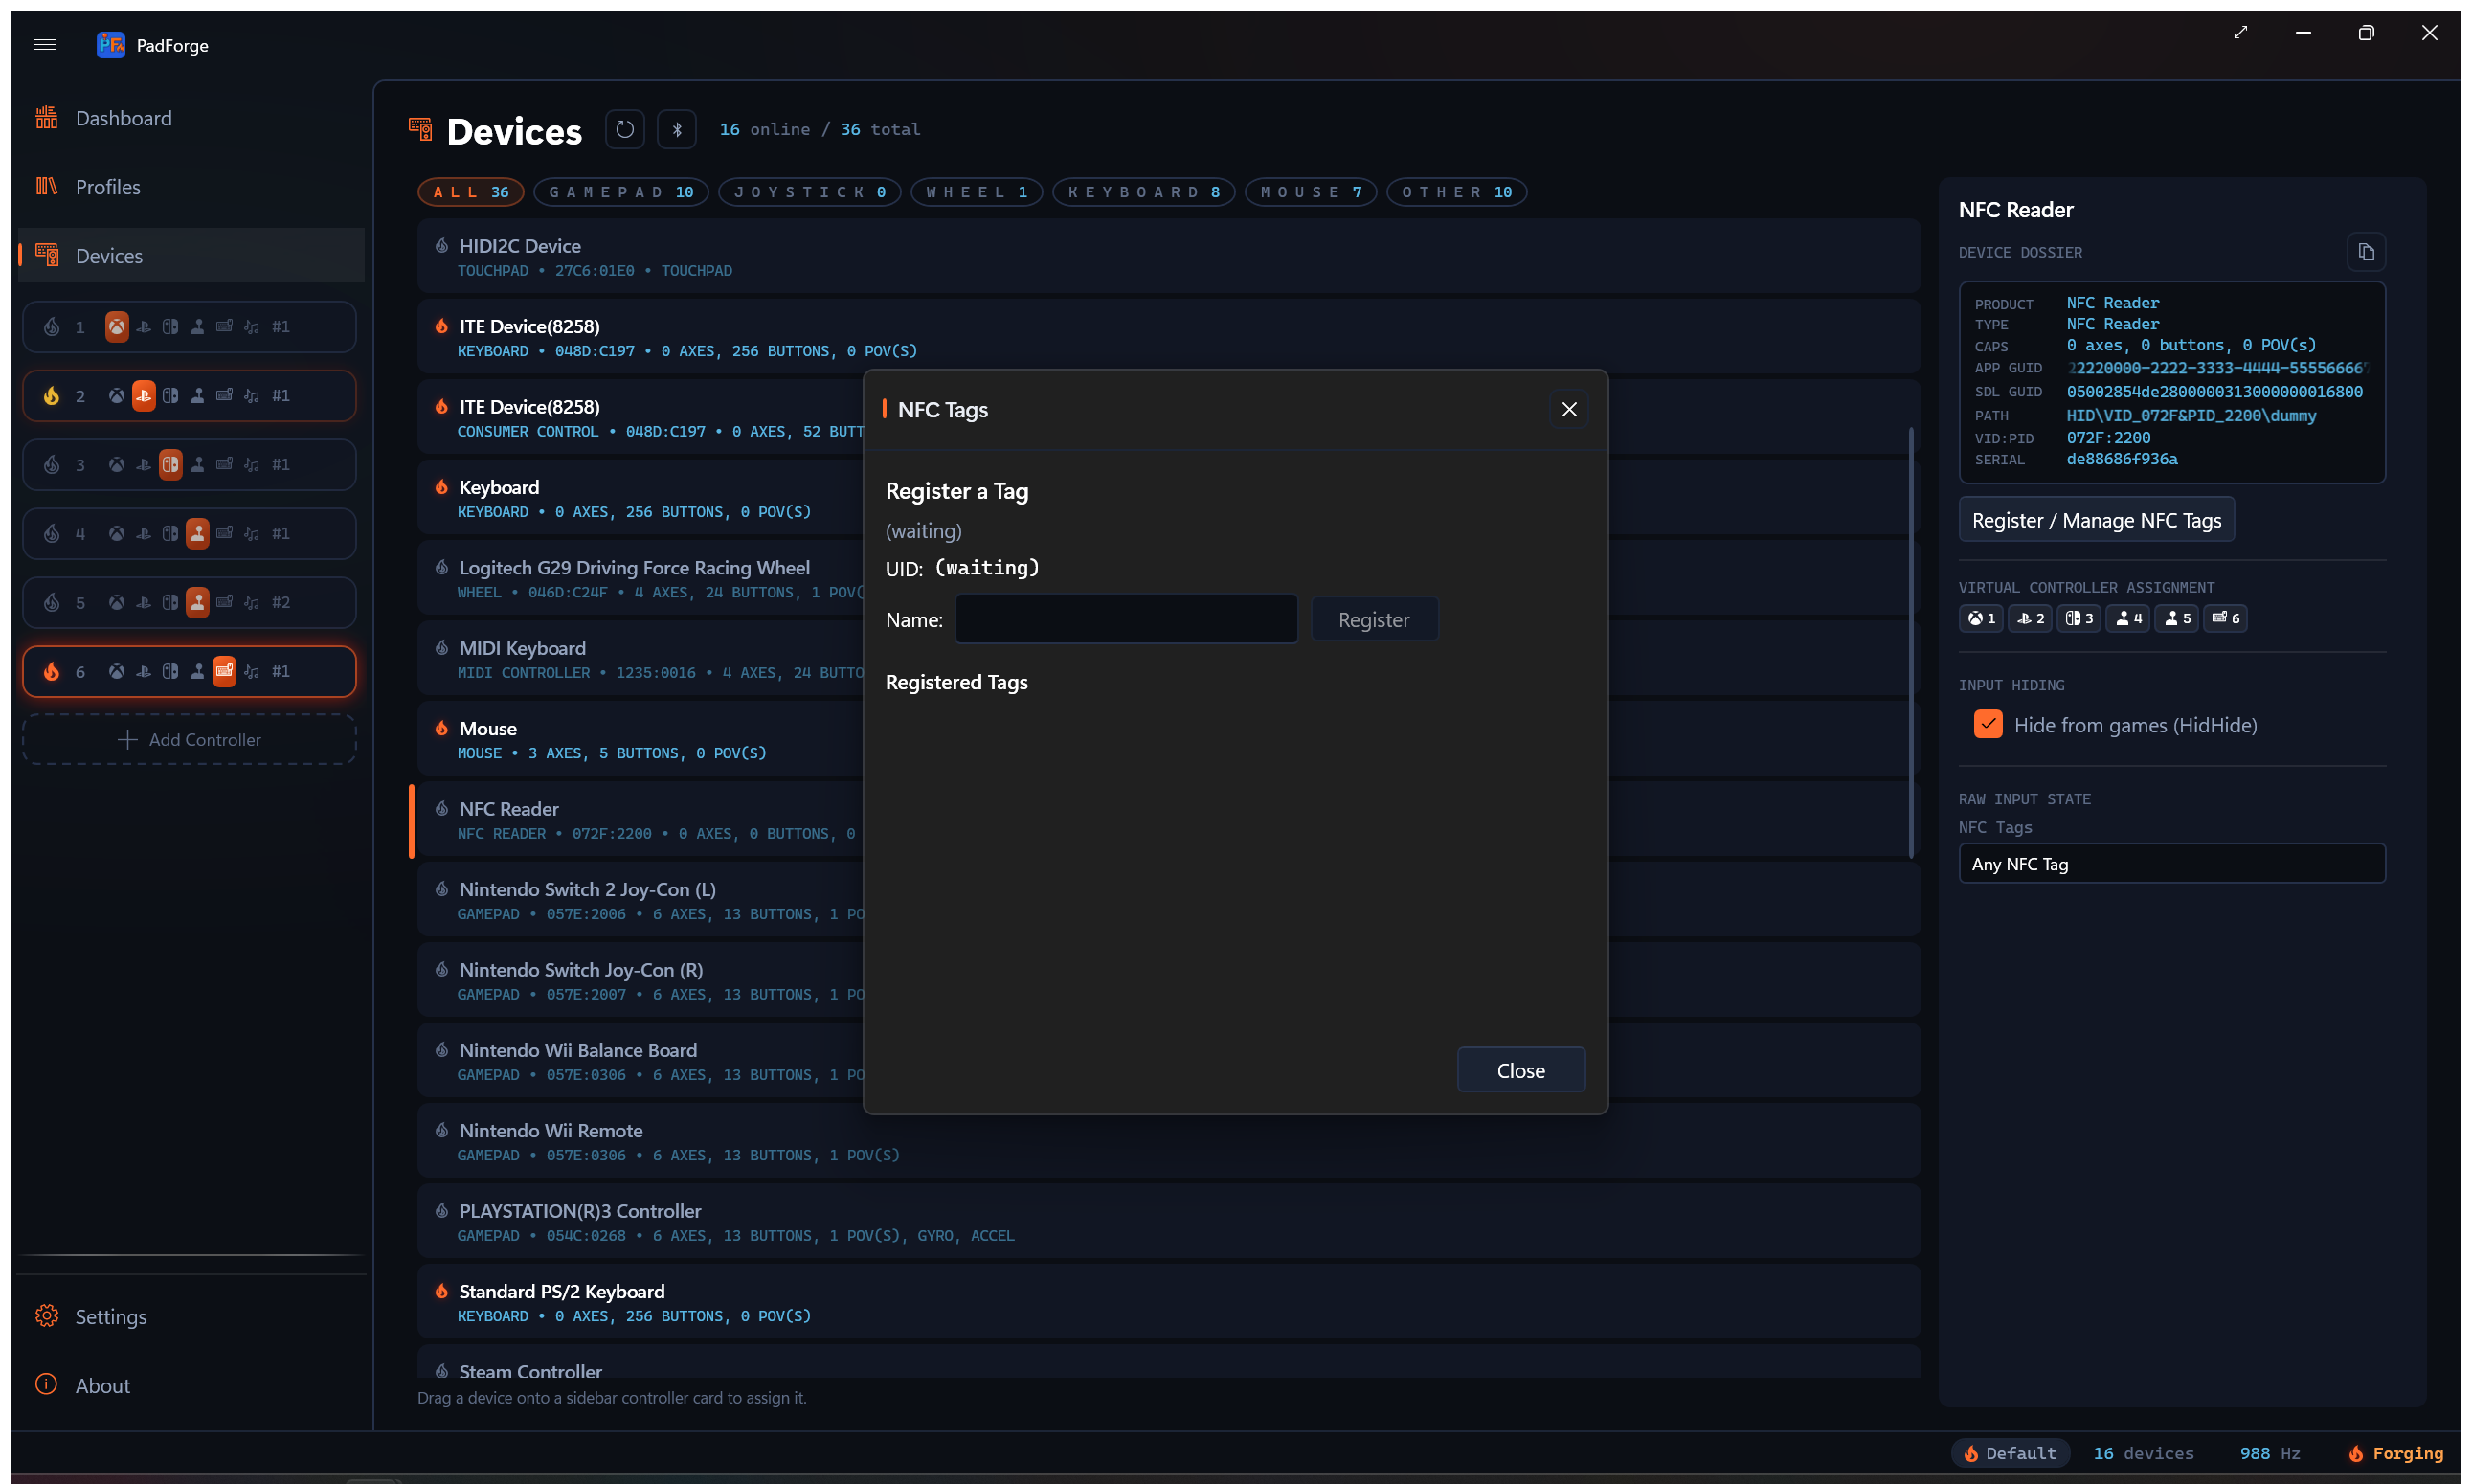
PadForge reads NFC tags from two kinds of hardware: a contactless smart-card reader (PC/SC class, such as an ACR122U) and the tag reader built into Switch controllers. Amiibo-style figures, tag stickers, and cards all work. Register a tag once, give it a name, and bind it like any other button. Both paths share one tag registry, so a tag registered on either binds on either.
The reader as a device
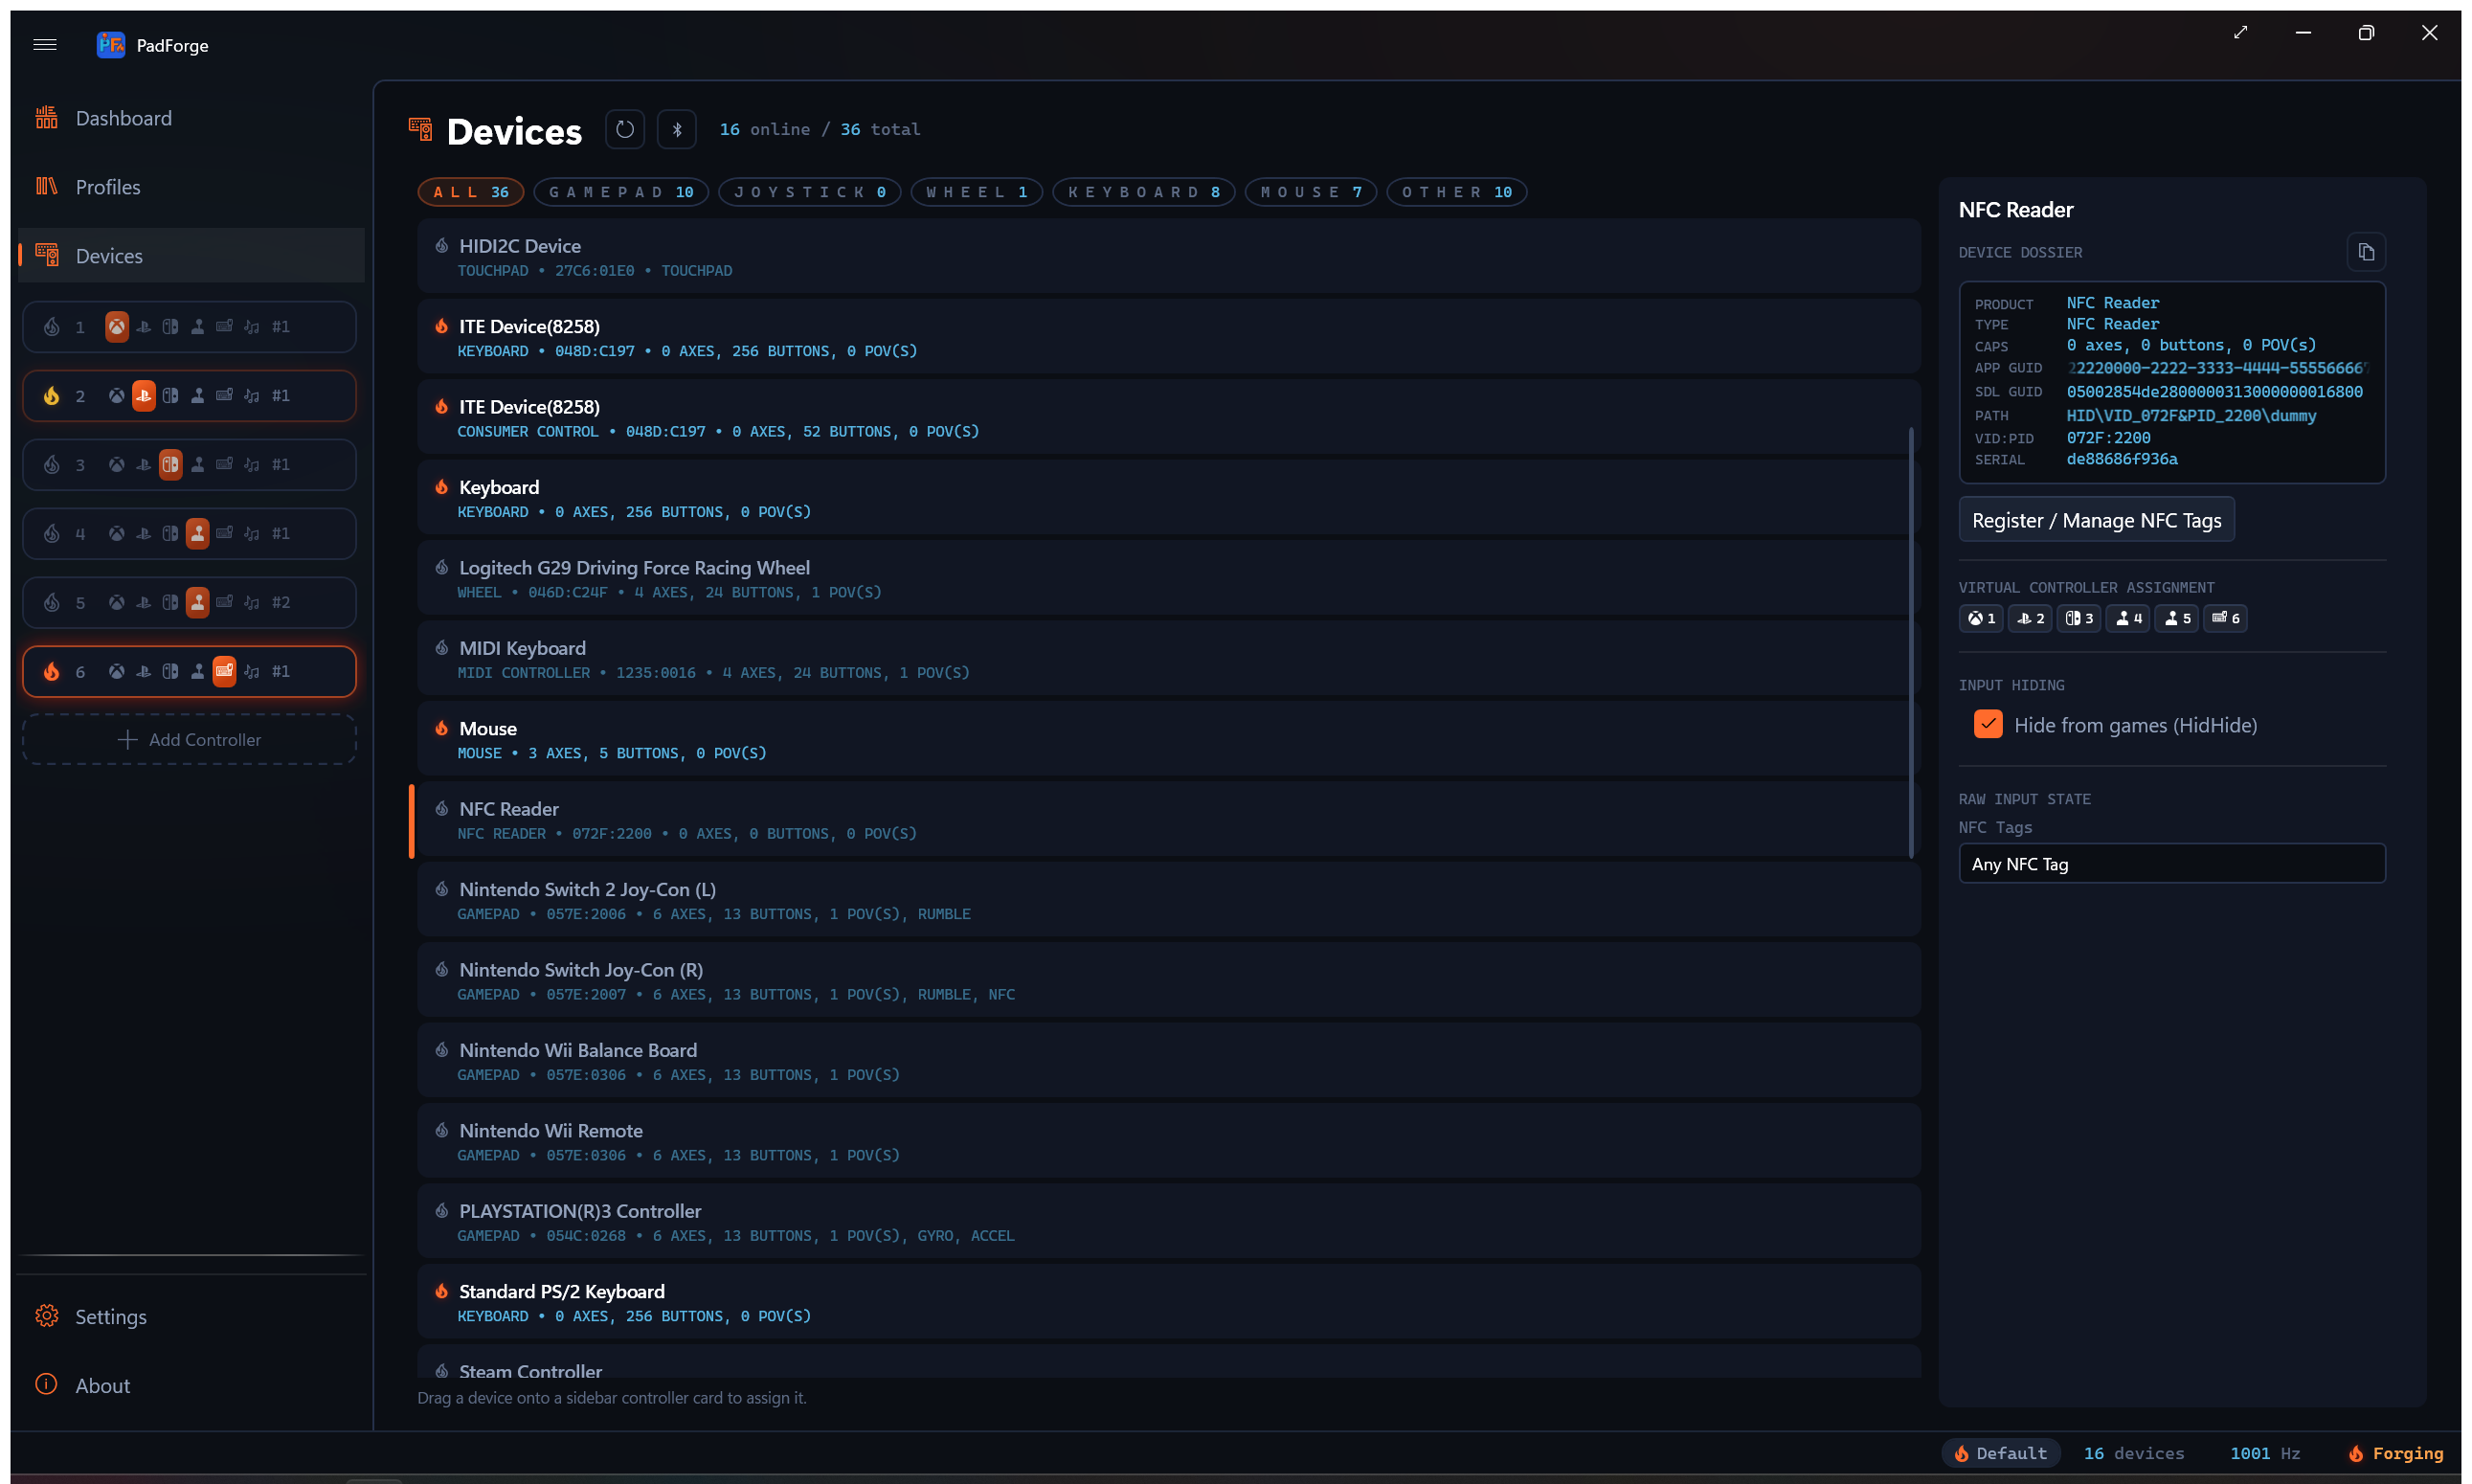
Plug in a PC/SC reader and it shows up on the Devices page as a device typed NFC Reader. Select its card to manage tags and to watch taps live.
The reader exposes buttons you can map:
- Any NFC Tag. Fires whenever any tag touches the reader, registered or not.
- One button per tag you have named. Only that tag fires it.
A tap fires the button for 175 ms, then releases it.
Switch controllers as readers
Since PadForge 4.1.0, the tag reader built into a Switch controller works too:
| Controller | Notes |
|---|---|
| Right Joy-Con | Standalone or as half of a pair |
| Joy-Con pair | The right Joy-Con carries the reader |
| Pro Controller | Original Switch model |
The controller's card shows an NFC chip in its capabilities line. The controller exposes the same sources the PC/SC reader does: Any NFC Tag plus one source per named tag.
The reader powers on only while an NFC source is bound or the NFC Tags dialog is open. Unused, it costs nothing.
A tag left resting on a controller's reader holds its button down. The button releases 175 ms after you lift the tag.
Limitations, stated plainly:
- Bluetooth only. Over USB the controller's reader never activates.
- Original Switch controllers only. Switch 2 controllers cannot read tags in PadForge.
Registering a tag
- On the Devices page, select the NFC reader or the Switch controller.
- Click Register / Manage NFC Tags.
- Tap a tag on the reader or on the controller. Its UID is captured.
- Type a name for the tag.
- Click Register.
The dialog listens to every source while open. A tap on a PC/SC reader and a tap on a connected Switch controller both capture the UID, and the dialog works with no PC/SC reader attached. In that case its status line reads "Tap a tag on your Switch controller…".
The dialog lists your registered tags. Each row shows its name and UID with a Remove button. Tap another tag to add more.
Tags are keyed by UID, not by reader. They carry over when you swap readers, from a reader to a controller, and across restarts.
Live tag preview
With the NFC reader selected, the Devices page lists your named tags, plus an Any NFC Tag row. Tap a tag and its row highlights, so you can confirm the reader sees it and check which tag you just touched.
Binding a tag
- Add the device that reads the tag (the PC/SC reader or the Switch controller) as an input device on the same slot as the mapping or macro.
- Pick that device in the mapping row's source picker or in the macro trigger.
- Pick Any NFC Tag or a specific named tag. A named tag shows as NFC Tag: followed by its name.
Tags work as ordinary mapping-row sources, so a tap can press a virtual button directly. In a macro trigger, the tap runs the action sequence instead.
Bindings follow the tag itself, not its name. Rename a tag and its bindings stay put.
Related pages
Last updated for PadForge 4.5.0.